Before you start
- A Google tag for a GA4 property must be installed on the same page as the chat widget.
- You need Marketer, Editor, or Administrator access to the property.
- Choose the property that receives data from the website where the chat is installed.
Create a key event
- 1
Open Events
In Google Analytics, choose the required account and GA4 property. Open Admin, then under Data display select Events.
- 2
Start creating an event
Click Create event and enter one exact chat event identifier, for example tc_client_chat_started.
- 3
Mark it as a key event
Enable Mark as key event. Leave the default monetary value unset unless your business has an agreed value for this conversion.
- 4
Choose Create with code
The widget already sends this event, so choose Create with code and click Create. Repeat for every event you want to measure as a goal.
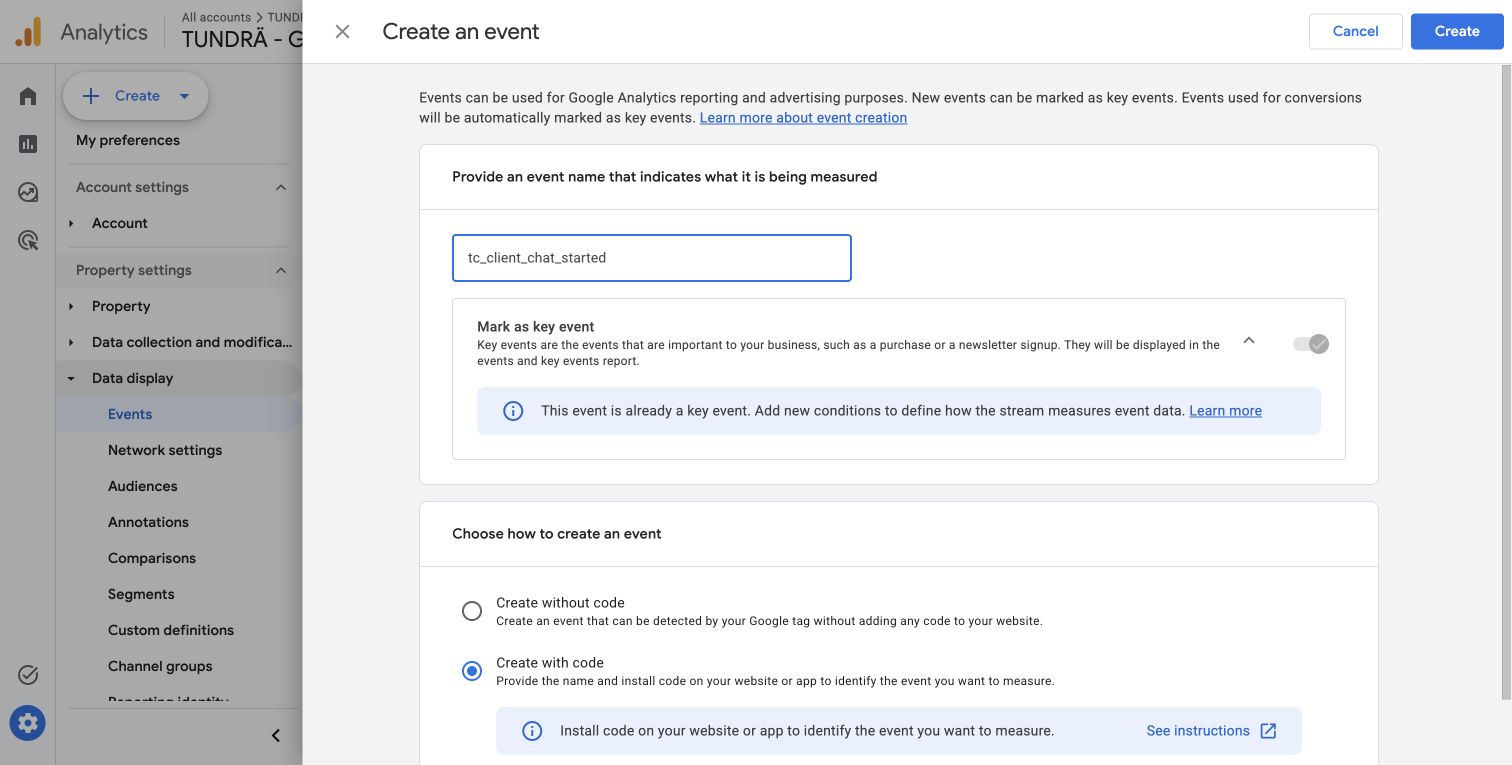
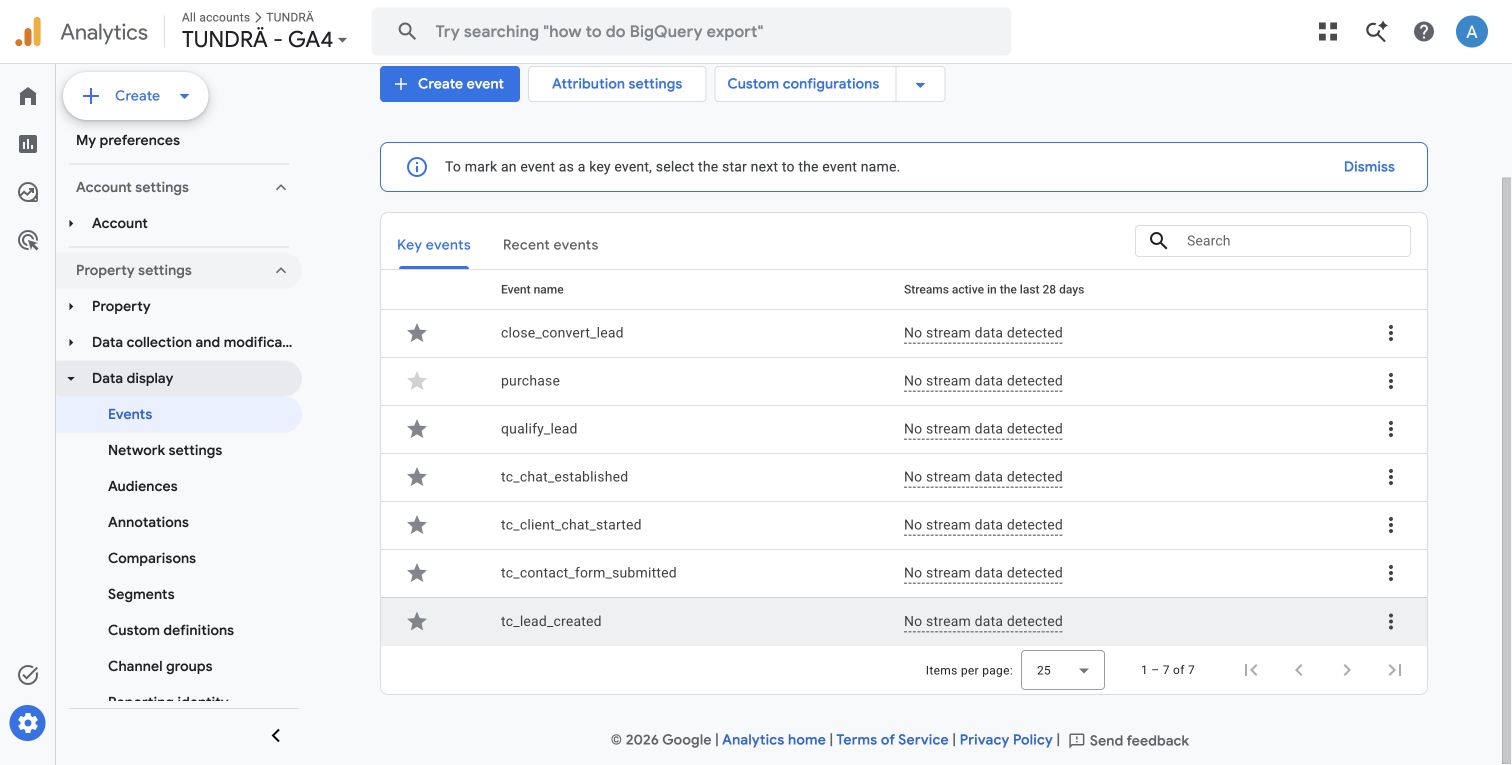
Screenshots show the English GA4 interface.
Recommended goals
Start with these four. They cover the main conversion funnel without creating unnecessary noise.
Visitor started a chat
tc_client_chat_started The visitor sent the first message. Use this as the main “chat request” conversion.
Conversation established
tc_chat_established An AI or human operator joined and the conversation was established.
Contact form submitted
tc_contact_form_submitted The visitor submitted the contact form inside the widget.
Lead created
tc_lead_created The chat produced a lead. This is usually the strongest business conversion.
All available events
Identifiers are the same for both product contours and for every widget language.
| Event identifier | When it fires |
|---|---|
tc_widget_loaded | Widget loaded on the page. |
tc_chat_opened | Visitor opened the chat window. |
tc_chat_closed | Visitor closed the chat window. |
tc_proactive_shown | A proactive invitation was shown. |
tc_proactive_accepted | Visitor replied to a proactive invitation. |
tc_client_chat_started | Visitor sent the first message. |
tc_chat_established | A conversation with an AI or human operator was established. |
tc_contact_form_shown | The contact form was shown. |
tc_contact_form_submitted | The contact form was submitted. |
tc_lead_created | A lead was created from the conversation. |
tc_operator_requested | The visitor requested a human operator. |
tc_operator_connected | A human operator joined the conversation. |
tc_dialog_completed | The conversation was completed. |
tc_client_message_sent | The visitor sent a message; the message number is passed as a parameter. |
tc_followup_shown | A follow-up prompt was shown. |
tc_quick_reply_clicked | The visitor selected a quick reply. |
tc_outbound_link_clicked | The visitor opened an external link from the chat. |
tc_privacy_policy_clicked | The visitor opened the privacy policy from the chat. |
Check that data is arriving
- 1
Open the website in a new tab and perform the configured action—for example, send the first chat message.
- 2
Open Reports → Realtime and find the event name. Realtime data usually appears within a few minutes.
- 3
Standard Events and key-event reports may take up to 24 hours to update. Do not create another event with the same name while you wait.